Introduction
There are few aromas as comforting and inviting as the sweet, spicy scent of homemade cinnamon rolls baking in the oven. That magical fragrance alone is enough to transport you to a cozy kitchen, promising a treat that’s warm, soft, and utterly irresistible. When you bite into one, you discover a tender, fluffy dough, swirled with a gooey, caramelized cinnamon-sugar filling, and crowned with a luscious, tangy cream cheese frosting. It’s a sensory experience that defines comfort food.
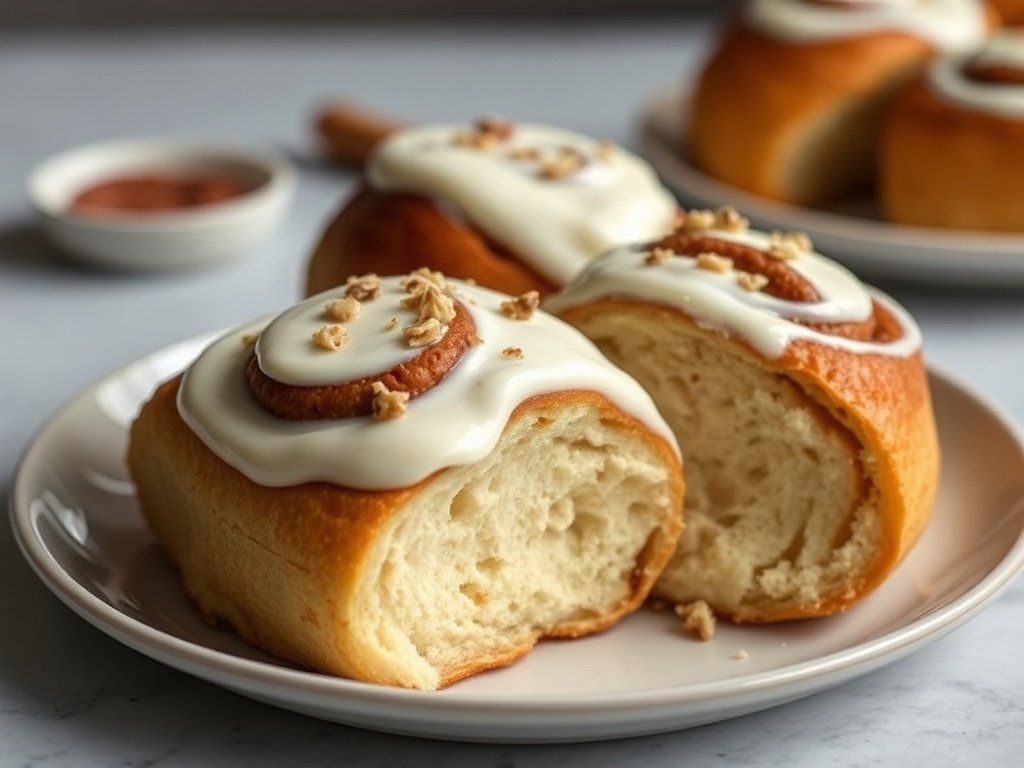
But what if we told you that classic indulgence could be even *better*? Our Cinnamon Walnut Rolls take everything you love about the traditional version and elevate it with the delightful crunch and rich, earthy flavor of toasted walnuts. This addition provides a wonderful textural contrast to the soft dough and gooey filling, adding another layer of complexity that perfectly complements the warm spice. Then there’s the frosting – a generous swirl of rich, slightly tangy cream cheese frosting that cuts through the sweetness, creating a perfectly balanced bite that will have you reaching for another.
These rolls are more than just a breakfast pastry; they are a labor of love, a weekend baking project that yields incredible rewards. Imagine serving these warm, fresh from the oven, to your loved ones on a lazy Sunday morning or for a special holiday brunch. While they may seem intimidating, mastering homemade yeast rolls is incredibly rewarding, and with our detailed guide, it’s easier than you think. Get ready to fill your home with an aroma that will beckon everyone to the kitchen, promising a taste of pure bliss.
Nutritional Information
Per serving (approximate values, assuming 12 rolls per batch):
- Calories: 590
- Protein: 9g
- Carbohydrates: 76g
- Fat: 29g
- Fiber: 3g
- Sodium: 260mg
Ingredients
For the Dough:
- 1 cup (240ml) whole milk, warmed to 105-115°F (40-46°C)
- 2¼ teaspoons (7g) active dry yeast (one standard packet)
- ¼ cup (50g) granulated sugar
- ½ cup (113g) unsalted butter, melted and cooled slightly
- 2 large eggs, at room temperature
- 1 teaspoon salt
- 4 to 4½ cups (480-540g) all-purpose flour, plus more for dusting
For the Cinnamon Walnut Filling:
- ½ cup (113g) unsalted butter, softened to room temperature
- ¾ cup (150g) packed light brown sugar
- 2 tablespoons ground cinnamon
- 1 cup (120g) chopped walnuts
For the Cream Cheese Frosting:
- 8 ounces (226g) full-fat cream cheese, softened to room temperature
- ½ cup (113g) unsalted butter, softened to room temperature
- 3½ cups (420g) powdered sugar, sifted
- 1 teaspoon vanilla extract
- Pinch of salt
Instructions
- Activate the Yeast: In a large mixing bowl (or the bowl of a stand mixer), combine the warmed milk, granulated sugar, and active dry yeast. Stir gently and let sit for 5-10 minutes until the mixture is foamy. This indicates your yeast is active and ready to work its magic. If it doesn’t foam, your yeast may be expired or the milk temperature was off, and you’ll need to start again with fresh yeast.
- Prepare the Dough: To the foamy yeast mixture, add the slightly cooled melted butter, eggs, and salt. Mix well. Gradually add 4 cups of the all-purpose flour, mixing until a shaggy dough forms. If using a stand mixer, attach the dough hook. Knead on low speed for 8-10 minutes, or if kneading by hand, turn the dough out onto a lightly floured surface and knead for 10-15 minutes. The dough should become smooth, elastic, and slightly sticky. Add the remaining flour, a tablespoon at a time, only if the dough is too sticky to handle, but avoid adding too much flour as it can make the rolls dry. The dough is ready when it passes the “windowpane test” – you should be able to stretch a small piece thin enough to see light through it without tearing.
- First Rise (Proofing): Lightly grease a clean large bowl with a little oil. Place the dough in the bowl, turning it once to coat the top. Cover the bowl tightly with plastic wrap or a clean kitchen towel. Place it in a warm, draft-free spot for 1 to 1½ hours, or until the dough has doubled in size. A slightly warm oven (turned off, with the light on) or a sunny spot on the counter works well.
- Prepare the Filling: While the dough is rising, prepare the cinnamon walnut filling. In a medium bowl, combine the softened butter, brown sugar, and ground cinnamon. Mix until well combined and creamy. Set aside. Have your chopped walnuts ready.
- Roll Out the Dough: Once the dough has doubled, gently punch it down to release the air. Turn the dough out onto a lightly floured surface. Using a rolling pin, roll the dough into a large rectangle, approximately 18×12 inches (45×30 cm). Aim for an even thickness across the entire rectangle to ensure consistent rolls.
- Assemble the Rolls: Spread the cinnamon butter mixture evenly over the entire surface of the rolled-out dough, leaving a small ½-inch border along one of the longer edges. Sprinkle the chopped walnuts evenly over the cinnamon filling.
- Roll and Slice: Starting from the long edge opposite the ½-inch border, tightly roll the dough into a log. The tighter you roll, the better the spirals will be. Pinch the seam closed to seal the log. Using a very sharp, un-serrated knife or, even better, unwaxed, unflavored dental floss, cut the log into 12 equal pieces, each about 1½ inches thick. To use dental floss, slide a piece under the log, cross the ends over the top, and pull to slice cleanly.
- Second Rise: Lightly grease a 9×13-inch baking pan. Arrange the sliced rolls in the prepared pan, leaving a little space between each roll as they will expand. Cover the pan loosely with plastic wrap or a clean kitchen towel. Let the rolls rise in a warm, draft-free spot for another 30-45 minutes, or until they have nearly doubled in size and look puffy.
- Preheat Oven & Bake: While the rolls are completing their second rise, preheat your oven to 375°F (190°C). Once the rolls are puffy, remove the cover and bake for 20-25 minutes, or until the tops are golden brown and the rolls are cooked through. An internal temperature of 200°F (93°C) indicates doneness. If the tops are browning too quickly, you can loosely tent the pan with aluminum foil.
- Prepare the Frosting: While the rolls are baking, prepare the cream cheese frosting. In a medium bowl, using an electric mixer, beat the softened cream cheese and softened butter together until smooth and creamy, with no lumps. Gradually add the sifted powdered sugar, a cup at a time, beating until fully incorporated after each addition. Mix in the vanilla extract and a pinch of salt. Beat on medium-high speed for 2-3 minutes until the frosting is light, fluffy, and smooth.
- Frost and Serve: Let the baked rolls cool in the pan for about 10-15 minutes. This allows them to set slightly but keeps them warm enough for the frosting to melt into a beautiful glaze. Generously spread the cream cheese frosting over the warm rolls. Serve immediately and enjoy the irresistible combination of warm, gooey, nutty, and tangy flavors! For a thicker, more set layer of frosting, allow the rolls to cool completely before frosting.
Cooking Tips and Variations
Creating bakery-quality cinnamon walnut rolls at home is entirely achievable with a few insider tricks and a little patience. Here are our top tips to ensure your rolls turn out perfectly every time, along with some ideas for delightful variations.
Yeast Wisdom
The success of any yeast dough hinges on active yeast. Always check the expiry date on your yeast packet. If you’re unsure, or if your yeast has been open for a while, perform a quick proofing test: combine your yeast with the warm milk (105-115°F / 40-46°C) and a pinch of sugar. If it doesn’t become visibly foamy within 5-10 minutes, your yeast is likely inactive, and it’s best to use a fresh packet. Too hot liquid will kill the yeast, while too cold liquid won’t activate it.
Proofing Patience
Dough rising takes time, and trying to rush it will result in dense, heavy rolls. Find a warm, draft-free spot for both your first and second rises. A slightly warm oven (turned off, with just the oven light on) is an excellent environment. Don’t be afraid to let the dough take its time; a slow, steady rise develops better flavor and a lighter texture. The dough should truly double in size for the first rise and look significantly puffy for the second.
Rolling Technique for an Even Rectangle
When rolling out your dough, aim for a consistent thickness across the entire rectangle. This ensures that all your rolls bake evenly and have uniform spirals. Use gentle, even pressure with your rolling pin, working from the center outwards. If the dough springs back too much, let it rest for 5-10 minutes to allow the gluten to relax, then continue rolling.
Tight Roll is Key
The secret to those beautiful, distinct spirals in your cinnamon rolls is to roll the dough as tightly as possible after spreading the filling. Start from one long edge and maintain firm, even pressure as you roll. A tight roll prevents gaps in the spiral and helps keep the filling from oozing out excessively during baking.
Cutting Cleanly
For perfectly round, un-squashed rolls, unwaxed, unflavored dental floss is your best friend. Slide a piece of floss under the rolled log, position it where you want to cut, cross the ends over the top, and pull them tightly in opposite directions. This creates a clean, even slice without compressing the dough. If using a knife, ensure it’s very sharp and un-serrated.
Don’t Overbake
Overbaked rolls will be dry and tough. Watch for a beautiful golden-brown color on top and ensure the internal temperature reaches around 200°F (93°C). The rolls should feel soft but set. If the tops are browning too quickly, loosely tent the pan with aluminum foil for the remainder of the baking time.
Frosting Consistency
For a smooth, lump-free cream cheese frosting, ensure both your cream cheese and butter are thoroughly softened to room temperature. This makes them easier to beat together into a creamy base. Sift your powdered sugar to prevent lumps and ensure a velvety texture. If your frosting is too thick, add a tiny splash of milk or cream; if it’s too thin, add a bit more sifted powdered sugar.
Variations to Explore
- Nut Swaps: Not a fan of walnuts? Pecans are an excellent substitute, offering a similar crunch and buttery flavor. Almonds could also work for a different profile.
- Citrus Zest: For a brighter flavor, add 1-2 teaspoons of orange or lemon zest to your dough or directly into the cinnamon filling. This provides a lovely aromatic lift.
- Maple Glaze: Instead of cream cheese frosting, try a simple maple glaze. Whisk together 2 cups powdered sugar, ¼ cup maple syrup, and 2-3 tablespoons of milk until smooth.
- Chocolate Drizzle: After frosting, melt some semi-sweet chocolate chips and drizzle artistically over the rolls for an extra layer of decadence.
- Spice It Up: Enhance the warmth of the filling by adding a pinch of nutmeg or cardamom along with the cinnamon.
Storage and Reheating
These Cinnamon Walnut Rolls are at their absolute best when enjoyed warm, fresh from the oven, with the frosting slightly melted and gooey. They are the perfect companion to a hot cup of coffee, a soothing mug of tea, or a tall glass of cold milk.
If you happen to have any leftovers (a rare occurrence!), proper storage will help maintain their deliciousness:
- Room Temperature: Store unfrosted or frosted rolls in an airtight container at room temperature for 1-2 days. The frosting will firm up slightly at room temperature.
- Refrigeration: For longer storage, refrigerate frosted rolls in an airtight container for up to 5 days. The frosting will become quite firm when chilled.
- Reheating: To reheat, place individual rolls in the microwave for 15-30 seconds, or wrap them loosely in foil and warm in a preheated 300°F (150°C) oven for 10-15 minutes, until heated through and soft. This brings back that wonderful fresh-baked warmth and gooey texture.
- Freezing Unbaked Rolls (Make-Ahead Option): After the second rise, but before baking, cover the pan tightly with plastic wrap and then aluminum foil. Freeze for up to 1 month. When ready to bake, transfer the frozen rolls to the refrigerator overnight to thaw. In the morning, let them come to room temperature for 30-60 minutes (they may need a short third rise if they haven’t quite puffed up) before baking as usual.
- Freezing Baked Rolls: Allow baked and frosted (or unfrosted) rolls to cool completely. Wrap individual rolls tightly in plastic wrap, then in aluminum foil, or place them in a freezer-safe airtight container. Freeze for up to 2-3 months. To reheat, thaw overnight in the refrigerator, then warm as directed above.
Frequently Asked Questions
Why didn’t my dough rise?
There are a few common culprits when dough fails to rise. The most frequent reason is inactive yeast; ensure your yeast is fresh and properly activated with warm (not hot!) milk. Another factor could be the temperature of your environment; yeast thrives in warmth, so a cold, drafty spot will significantly slow or halt the rising process. Lastly, ensure you haven’t added too much flour during kneading, as this can make the dough too dense and stiff for the yeast to work effectively.
Can I prepare these cinnamon rolls ahead of time?
Absolutely! These rolls are fantastic for making ahead. You have two main options: you can prepare the rolls up to the second rise, arrange them in the baking pan, cover tightly, and refrigerate overnight. In the morning, simply take them out, let them sit at room temperature for 30-60 minutes to take the chill off and finish their rise, then bake as directed. Alternatively, you can freeze the unbaked rolls after the second rise as detailed in the “Storage and Reheating” section.
What’s the best way to get a perfectly tight roll for beautiful spirals?
The key to a tight, even spiral lies in your rolling technique. After spreading the filling, start rolling from one of the long edges closest to you. Apply firm, consistent pressure as you roll, ensuring the dough is pulled taut with each turn. Avoid loosely rolling, as this creates gaps. As you reach the end, pinch the seam firmly to seal the log, which helps maintain the shape during the second rise and baking.
My cream cheese frosting is lumpy, what went wrong?
Lumpy cream cheese frosting is almost always due to ingredients not being at room temperature. Both the cream cheese and butter must be thoroughly softened before you begin mixing. If they are cold, they won’t cream together smoothly, leading to lumps. Beat them together until completely smooth before gradually adding the sifted powdered sugar. If you find yourself with lumps, you can try gently warming the bowl over a hot water bath for a minute or two and beating again, or pressing the frosting through a fine-mesh sieve.
