Introduction
In the culinary world, some recipes transcend mere ingredients, telling a story of resilience, ingenuity, and the enduring power of comfort food. The Chocolate Depression Cake is one such marvel, a testament to human spirit during times of scarcity. Born from necessity during the austere years of the Great Depression in the 1930s, this humble dessert became a beacon of sweetness when resources were scarce and spirits needed lifting. It’s a recipe that perfectly embodies the resourcefulness of an era, proving that deliciousness doesn’t always require a pantry overflowing with luxury.
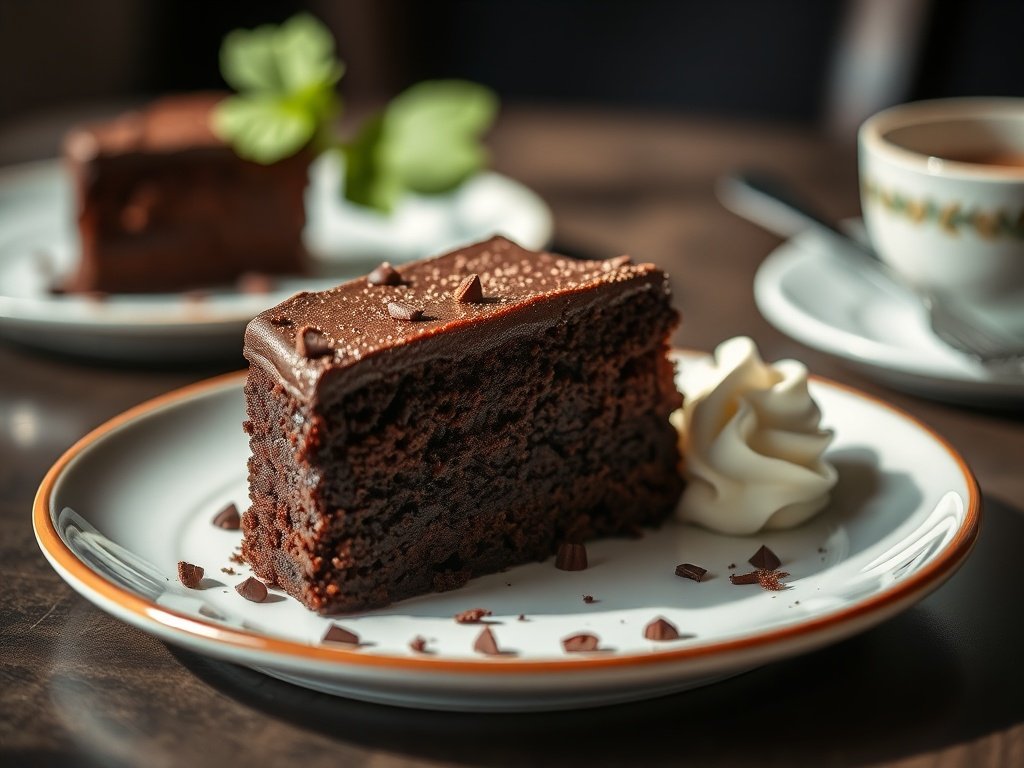
Often referred to by various affectionate monikers like “Wacky Cake,” “Poor Man’s Cake,” or “War Cake,” this ingenious creation was designed to be made without eggs, butter, or milk – ingredients that were either rationed, prohibitively expensive, or simply unavailable to many families. The brilliance lies in its simplicity and the clever use of pantry staples. Our version elevates this historical classic by embracing the universal appeal of chocolate, transforming a modest cake into a deeply satisfying and surprisingly indulgent treat. It’s a cake that doesn’t just taste good; it feels good, connecting us to a past where every morsel was cherished.
Prepare to be amazed by a cake that defies expectations. Despite its minimalist ingredient list, the Chocolate Depression Cake delivers a remarkably moist, tender, and intensely chocolatey crumb. It’s naturally vegan and dairy-free, making it an accessible delight for many dietary preferences without any compromise on flavor or texture. This isn’t just a recipe; it’s an edible piece of history, a symbol of making the most with what you have, and a reminder that true comfort can be found in the simplest of pleasures.
Nutritional Information
Per serving (approximate values for 1/12 of the cake):
- Calories: 210
- Protein: 2g
- Carbohydrates: 30g
- Fat: 10g
- Fiber: 1g
- Sodium: 190mg
Ingredients
For the Chocolate Depression Cake:
- 1 ½ cups (180g) all-purpose flour
- 1 cup (200g) granulated sugar
- ½ cup (45g) unsweetened cocoa powder
- 1 teaspoon baking soda
- ½ teaspoon salt
- ½ cup (120ml) neutral-flavored vegetable oil (such as canola, sunflower, or grapeseed)
- 1 teaspoon pure vanilla extract
- 1 tablespoon white vinegar
- 1 cup (240ml) cold water or cold brewed coffee
Optional Simple Chocolate Glaze:
- 1 cup (120g) powdered sugar
- 3 tablespoons unsweetened cocoa powder
- 2-3 tablespoons plant-based milk (almond, soy, oat) or water
- ½ teaspoon vanilla extract
Instructions
-
Preheat and Prepare: Preheat your oven to 350°F (175°C). Lightly grease and flour an 8×8 inch (20×20 cm) square baking pan, or a 9-inch (23 cm) round pan. You can also line the bottom with parchment paper for easier removal if desired.
-
Combine Dry Ingredients: In a large mixing bowl, whisk together the all-purpose flour, granulated sugar, unsweetened cocoa powder, baking soda, and salt. Ensure there are no lumps and the ingredients are well combined. This is crucial for an even rise and flavor distribution.
-
Add Wet Ingredients: Create three “wells” or depressions in the dry mixture using a spoon or your knuckles. Pour the vegetable oil into one well, the vanilla extract into another, and the white vinegar into the third well. Finally, pour the cold water (or coffee) over the entire mixture.
-
Mix Gently: Using a whisk or a spatula, gently mix all the ingredients together until just combined. Be careful not to overmix; a few small lumps are perfectly fine and will disappear during baking. Overmixing can develop the gluten in the flour too much, leading to a tough cake. The mixture will be quite liquidy, which is normal for this recipe.
-
Pour and Bake: Pour the batter evenly into your prepared baking pan. Transfer the pan to the preheated oven and bake for 30-35 minutes for an 8×8 inch pan, or 25-30 minutes for a 9-inch round pan. The exact baking time may vary slightly depending on your oven.
-
Test for Doneness: To check if the cake is done, insert a toothpick into the center. If it comes out clean or with a few moist crumbs attached, the cake is ready. If it comes out wet with raw batter, return the cake to the oven for another 3-5 minutes and test again.
-
Cool: Once baked, remove the cake from the oven and place it on a wire rack to cool in the pan for about 10-15 minutes. This allows the cake to set and prevents it from crumbling. After this initial cooling, you can carefully invert the cake onto the wire rack to cool completely before frosting or slicing. A completely cooled cake is easier to handle and cut.
-
Prepare Optional Glaze (if using): While the cake cools, whisk together the powdered sugar, cocoa powder, plant-based milk (or water), and vanilla extract in a small bowl until smooth and free of lumps. Add more liquid a teaspoon at a time if needed to reach your desired pouring consistency.
-
Glaze and Serve: Once the cake is completely cool, drizzle the chocolate glaze over the top, allowing it to drip down the sides. Let the glaze set for a few minutes before slicing and serving. Enjoy your slice of history!
Cooking Tips and Variations
The Chocolate Depression Cake is a wonderfully forgiving recipe, but a few pointers can ensure an even more spectacular result. For best success, make sure your baking soda is fresh, as its leavening power is key to the cake’s rise. An easy test for baking soda freshness is to mix a teaspoon of it with a tablespoon of vinegar; if it fizzes vigorously, it’s good to go. Also, while the “one-pan” method (mixing directly in the greased pan) is traditional, using a separate bowl for mixing dry and wet ingredients separately before combining can sometimes lead to a more evenly mixed batter and a consistent crumb, especially for novice bakers. Remember, gentle mixing is paramount; stop as soon as the ingredients are just combined to avoid overdeveloping gluten, which can make the cake tough.
Flavor Boosters
To truly enhance the chocolate profile, consider using cold brewed coffee instead of water. Coffee, especially dark roast, doesn’t make the cake taste like coffee but deepens and intensifies the chocolate flavor, making it richer and more complex. A pinch of espresso powder (about 1/2 teaspoon) added to the dry ingredients can achieve a similar effect if you don’t have brewed coffee on hand. For a hint of warmth, a dash of cinnamon or a tiny pinch of cayenne pepper can add an unexpected depth and subtle spice that complements the chocolate beautifully. A teaspoon of instant espresso powder mixed into the dry ingredients also works wonders in boosting the chocolate’s natural bitterness and complexity.
Frosting & Topping Ideas
While the simple chocolate glaze provided in the recipe is delightful, there are many ways to elevate your Depression Cake. For a truly decadent experience, a simple vegan chocolate buttercream frosting made with vegan butter, powdered sugar, cocoa powder, and a splash of plant-based milk would be a fantastic addition. Alternatively, a sprinkle of powdered sugar is a classic and elegant touch that requires no additional cooking. Fresh berries like raspberries or strawberries, or even a dollop of vegan whipped cream, can add freshness and cut through the richness of the chocolate. A light dusting of cocoa powder or a sprinkling of chocolate shavings also makes for a beautiful presentation.
Creative Variations
This basic recipe is a perfect canvas for creativity. For a mint chocolate version, add 1/2 teaspoon of mint extract along with the vanilla. Orange zest (from one orange) can be added to the dry ingredients for a vibrant chocolate-orange cake. Stir in a handful of vegan chocolate chips or chopped nuts (pecans or walnuts work well) into the batter just before baking for added texture and flavor. You could also experiment with different flours; while all-purpose flour is standard, a portion of whole wheat pastry flour could add a nutty note, or a gluten-free all-purpose blend can be used for a gluten-free version (ensure it contains xanthan gum or add 1/2 teaspoon if not). For a slightly different acidic kick, you can substitute apple cider vinegar for white vinegar, which imparts a subtle fruity note.
Serving Suggestions
This comforting cake is perfect on its own, perhaps with a cup of tea or coffee. For a more elaborate dessert, serve a slice warm with a scoop of your favorite dairy-free vanilla ice cream or a generous dollop of coconut whipped cream. It’s also excellent as a potluck dessert, a simple birthday cake, or just a treat to brighten an ordinary day. The cake’s humble origins make it a fantastic conversation starter, reminding everyone of the power of simple, honest food. Its naturally vegan nature also makes it a crowd-plepleasing option for gatherings where dietary restrictions might be a concern. Consider serving it with a side of fresh fruit salad for a refreshing contrast to the rich chocolate.
Storage and Reheating
The Chocolate Depression Cake is known for its excellent keeping qualities, a trait undoubtedly appreciated during its origins when food waste was unthinkable. To store, ensure the cake is completely cooled before covering it. Wrap the cake tightly in plastic wrap or aluminum foil, or place it in an airtight container. Stored at room temperature, it will remain fresh and moist for 3-4 days. If you wish to extend its shelf life, you can refrigerate it for up to a week; however, bring it back to room temperature before serving for the best texture and flavor. The cold can sometimes make the cake feel a little denser, so letting it warm up allows the oil to soften and the crumb to become tender again.
For longer storage, this cake freezes beautifully. Once completely cooled, wrap individual slices or the entire cake tightly in plastic wrap, then an additional layer of aluminum foil. Place it in a freezer-safe bag or container. It can be stored in the freezer for up to 2-3 months. To thaw, simply transfer the cake from the freezer to the refrigerator overnight, or let it sit at room temperature for a few hours. Avoid using a microwave for thawing, as it can alter the texture and make the cake gummy. If you’ve frozen individual slices, they will thaw more quickly. Once thawed, you can enjoy it as is, or gently warm individual slices in the microwave for 15-30 seconds for a “freshly baked” feel, especially if you’re serving it with ice cream. This cake truly stands the test of time, just like the resilience it represents.
Frequently Asked Questions
What makes this cake so moist without eggs or dairy?
The secret to the Chocolate Depression Cake’s incredible moisture and tender crumb lies in a clever chemical reaction and the use of oil. The combination of baking soda (an alkaline ingredient) and white vinegar (an acid) creates carbon dioxide bubbles when they react, which acts as a leavening agent, making the cake rise and giving it a light, airy texture without the need for eggs. Additionally, the generous amount of vegetable oil provides the necessary fat for moisture and tenderness, effectively replacing butter or other dairy fats. This ingenious method not only makes the cake naturally vegan but also contributes to its famously moist and fudgy consistency.
Can I substitute the white vinegar for another acid?
Absolutely! While white vinegar is traditional and provides a neutral flavor, other acidic ingredients can be used. Apple cider vinegar is an excellent substitute, offering a slightly fruitier note that can complement the chocolate well. Lemon juice can also work in a pinch, though it might impart a very subtle citrus flavor. The key is to use an acid that will react with the baking soda to create the leavening. Avoid using balsamic vinegar or other strongly flavored vinegars unless you specifically want that flavor profile in your cake. The amount typically remains the same, usually one tablespoon.
Why is it called “Depression Cake” or “Wacky Cake”?
The name “Depression Cake” directly refers to its origin during the Great Depression era in the 1930s. During this period of economic hardship, eggs, milk, and butter were scarce, expensive, or rationed. Homemakers invented resourceful recipes like this cake to provide comforting treats using only basic, inexpensive pantry staples. The moniker “Wacky Cake” likely comes from the unusual method of mixing the ingredients directly in the pan, creating “wells” for the wet ingredients before stirring, which must have seemed “wacky” compared to traditional baking methods. It’s a testament to the ingenuity born from necessity and the ability to find joy in simple pleasures, even during the toughest times.
Can I make this cake gluten-free?
Yes, you can adapt this Chocolate Depression Cake to be gluten-free. The simplest way is to substitute the all-purpose flour with a high-quality gluten-free all-purpose flour blend. When choosing a blend, look for one that specifically states it’s suitable for baking or contains xanthan gum. If your chosen blend does not contain xanthan gum, you might want to add about 1/2 teaspoon of it to the dry ingredients to help with the cake’s structure and prevent it from being too crumbly. The rest of the recipe ingredients and steps remain the same, making it a relatively straightforward conversion. Always ensure all your other ingredients are certified gluten-free if catering to strict dietary needs.
