Easy Homemade Sourdough Starter Recipe (No Yeast Required)
If you’ve ever dreamed of baking crusty, artisan-style sourdough bread at home, the secret ingredient is a bubbly, active sourdough starter. This natural yeast culture is made simply from flour and water—and a little time. In just 5 to 7 days, you can create your own wild yeast starter that will fuel everything from rustic sourdough loaves to pancakes, waffles, pizza crust, and more. No commercial yeast needed!
Sourdough starters are not only easy to make but also packed with gut-friendly probiotics. This is a great baking project for beginners who want to experiment with slow fermentation and traditional techniques. It’s a living culture you feed and nurture, and once established, it can last forever with proper care!
Ingredients:
- 1 cup all-purpose flour (unbleached preferred)
- 1/2 cup water (filtered or dechlorinated, room temperature)
- 1 tablespoon sugar or honey (optional, to help boost initial fermentation)
Instructions:
Day 1 – Create Your Starter: In a clean glass jar or bowl, combine 1 cup flour, 1/2 cup water, and 1 tablespoon sugar or honey. Mix until smooth and no dry spots remain. Loosely cover with a breathable cloth or a lid set ajar. Leave it on your counter at room temperature (ideally 70–75°F).
Day 2 to Day 7 – Feed Daily: Each day, discard about half of your starter (this keeps it from growing too large and refreshes the pH). Then, feed it with 1/2 cup flour and 1/4 cup water. Stir well, scrape down the sides, and cover loosely again. Continue feeding every 24 hours.
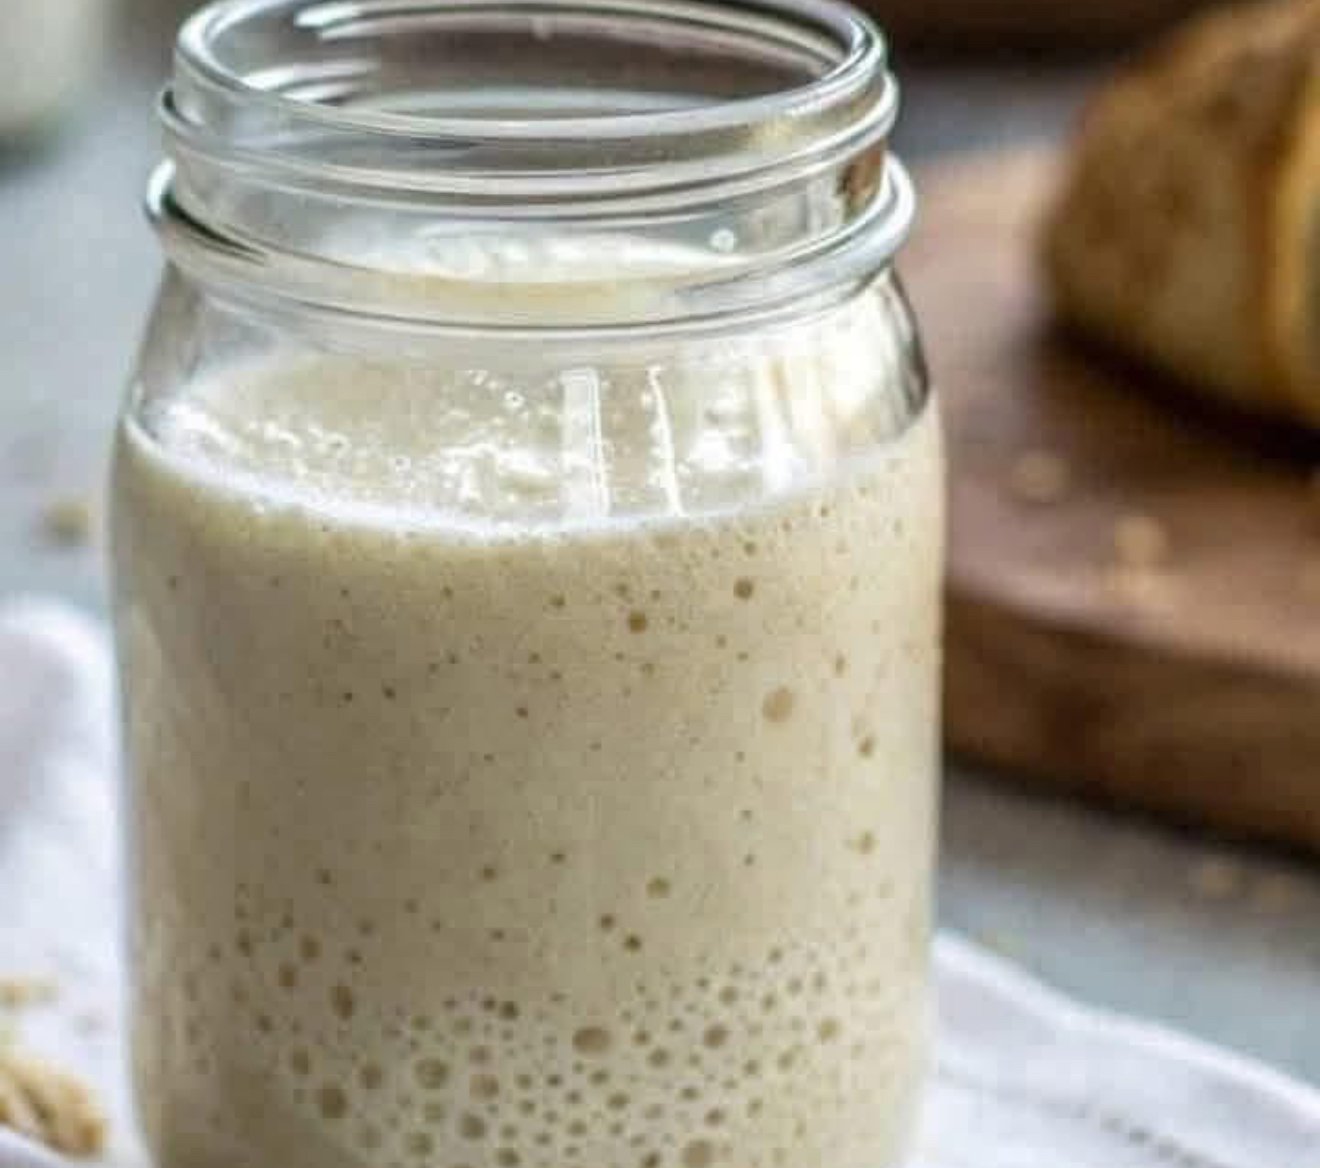
Signs Your Starter is Ready: After 5 to 7 days, your starter should be doubling in size within 4 to 6 hours of feeding, full of bubbles, and smell pleasantly tangy—like yogurt or slightly fruity vinegar. This means it’s active and ready to use in baking.
Ongoing Storage: If you’re not baking every day, you can store your sourdough starter in the refrigerator. Feed it once a week by discarding half and refreshing it with 1/2 cup flour and 1/4 cup water. Let it sit out for a few hours before placing it back in the fridge.
Tips for the Best Sourdough Starter:
- Use unbleached flour: Bleached flour can sometimes inhibit yeast activity. All-purpose, whole wheat, or rye flour all work well.
- Filtered water is key: Tap water often contains chlorine, which can slow fermentation. Use filtered or bottled water if possible.
- Maintain a warm environment: Yeast grows best in temperatures around 70–75°F. If your kitchen is cool, place the jar in the oven (turned off) with the light on.
- Don’t worry about hooch: A layer of liquid on top (called hooch) means your starter is hungry. Pour it off or stir it back in before feeding.
- Label your jar: Mark the height of the starter after feeding so you can see how much it rises.
Ways to Use Your Starter:
Once your starter is bubbly and active, you can use it to make a wide variety of sourdough recipes. Start with a basic sourdough loaf, then move on to pizza dough, sandwich bread, English muffins, pancakes, or even cinnamon rolls. The flavor develops more depth over time, and your baked goods will have that classic chewy texture and subtle tang.
Prep Time & Storage:
- Initial Prep Time: 5 minutes per day
- Total Fermentation Time: 5 to 7 days
- Storage: Keep in refrigerator once mature and feed weekly
Why You’ll Love It:
This easy sourdough starter recipe is ideal for beginners who want to take their baking to the next level. It’s budget-friendly, requires no special ingredients, and unlocks a world of homemade sourdough possibilities. Plus, it’s naturally fermented, which may be easier to digest and better for your gut health.
Start today, and in a week, you’ll have your own bubbling jar of wild yeast magic, ready to turn into beautiful golden loaves of real, homemade sourdough bread.
