Introduction
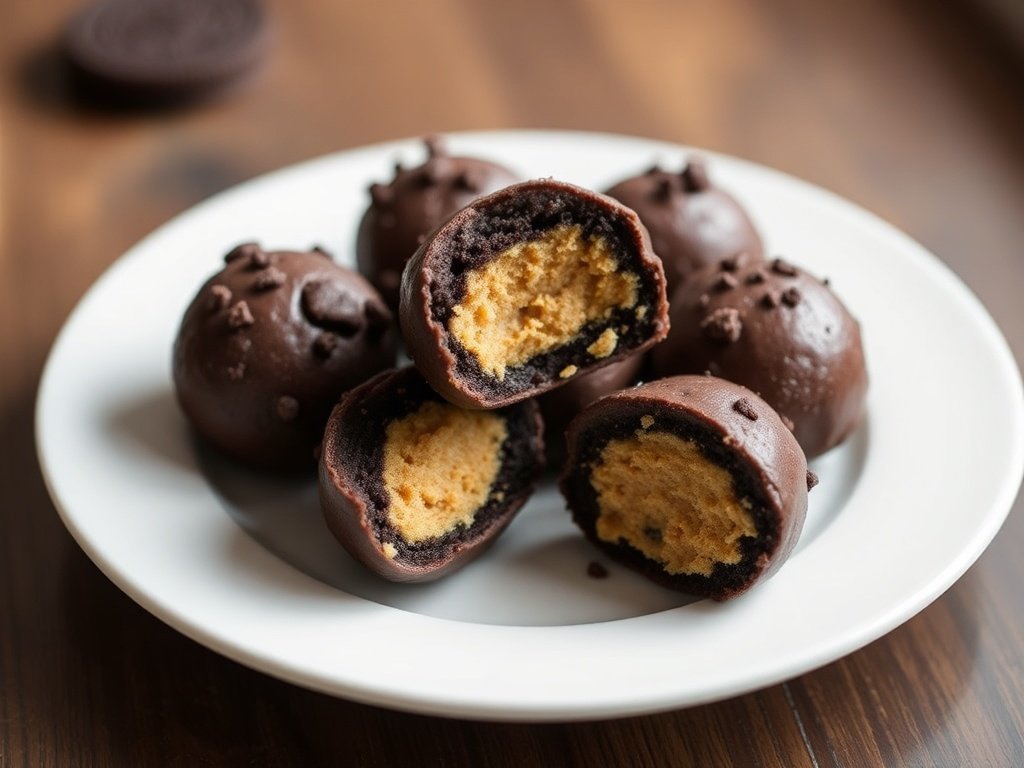
Get ready to discover your new favorite dessert that requires absolutely no baking, minimal effort, and delivers maximum flavor! These 3 Ingredient Peanut Butter Oreo Cookie Balls are a true culinary marvel, transforming a few humble pantry staples into an irresistibly decadent treat. Imagine the rich, chocolatey crunch of finely crushed Oreo cookies, perfectly bound together with creamy, luscious peanut butter, and then enveloped in a smooth, sweet chocolate coating. It’s a textural and flavor delight that hits all the right notes: sweet, salty, creamy, and crunchy.
What makes this no-bake recipe truly special is its incredible simplicity and versatility. Whether you’re a seasoned baker or a complete novice in the kitchen, you can whip up a batch of these crowd-pleasing cookie balls in under an hour of active prep time. They are the ultimate easy dessert, perfect for those last-minute cravings, busy weeknights, or when you need a simple treat that looks and tastes impressive. From holiday gatherings and birthday parties to casual get-togethers and thoughtful homemade gifts, these peanut butter Oreo cookie balls are guaranteed to be a hit, appealing to both kids and adults alike. Their nostalgic flavors remind many of classic treats, making them a beloved recipe that quickly becomes a family favorite.
Forget the oven and complicated ingredient lists. This recipe celebrates the magic of minimal effort, proving that some of the most delicious indulgences can come from the simplest combinations. So, gather your three essential ingredients, and prepare to create a batch of these delightful, no-bake wonders that are sure to become your new go-to for effortless indulgence.
Nutritional Information
Per serving (approximate values for 1 cookie ball, based on 30 servings):
- Calories: 140kcal
- Protein: 2g
- Carbohydrates: 17g
- Fat: 8g
- Fiber: 1g
- Sodium: 105mg
Ingredients
- 1 package (14.3 ounces or 406g) original Oreo cookies
- 1/2 cup (128g) creamy peanut butter
- 10-12 ounces (280-340g) melting chocolate (semi-sweet, milk, or dark chocolate chips, melting wafers, or baking chocolate bars)
- Optional: 1 teaspoon coconut oil or shortening (for chocolate coating)
Instructions
- Prepare the Oreo Crumbs: Begin by crushing your Oreo cookies. The most efficient way to achieve fine, uniform crumbs is to use a food processor. Place the entire package of Oreo cookies (including the cream filling) into the food processor. Pulse several times until the cookies are finely crushed into a consistent crumb. If you don’t have a food processor, you can place the cookies in a large, heavy-duty Ziploc bag, seal it, and use a rolling pin or a heavy object to crush them into fine crumbs. Ensure there are no large chunks remaining, as this will affect the texture of your cookie balls.
- Combine with Peanut Butter: Transfer the finely crushed Oreo crumbs into a large mixing bowl. Add the 1/2 cup of creamy peanut butter to the bowl. Using a sturdy spatula, spoon, or even your clean hands (which is often the most effective method), mix the peanut butter and Oreo crumbs thoroughly. Continue mixing until the mixture is well combined and forms a thick, uniform dough-like consistency. It should be moist enough to hold its shape when pressed together.
- Roll the Cookie Balls: Line a baking sheet with parchment paper or wax paper. Scoop out small portions of the mixture, approximately 1 tablespoon each. Roll each portion between your palms to form smooth, round balls, about 1 to 1.5 inches in diameter. Arrange the rolled balls in a single layer on the prepared baking sheet. This recipe typically yields about 28-32 cookie balls, depending on their size.
- Chill the Cookie Balls: Once all the cookie balls are rolled, place the baking sheet in the refrigerator. Chill the balls for at least 20-30 minutes. This step is crucial as it helps the balls firm up, making them easier to dip in chocolate and preventing them from falling apart when coated.
- Prepare the Melting Chocolate: While the cookie balls are chilling, prepare your melting chocolate. If using chocolate chips or baking bars, place them in a microwave-safe bowl. Microwave on high for 30-second intervals, stirring well after each interval, until the chocolate is fully melted and smooth. Be careful not to overheat the chocolate, as it can seize. Alternatively, you can use a double boiler method: place the chocolate in a heatproof bowl set over a pot of simmering water, stirring until melted. If you’re using melting wafers or candy melts, follow the package directions for melting. For an extra smooth and easy-to-dip consistency, you can stir in 1 teaspoon of coconut oil or shortening into the melted chocolate.
- Dip the Cookie Balls: Remove the chilled cookie balls from the refrigerator. Using a fork, a dipping tool, or even a toothpick, carefully dip each cookie ball into the melted chocolate, ensuring it is fully coated. Gently tap off any excess chocolate by lightly tapping the fork or tool against the rim of the bowl.
- Set the Chocolate Coating: Carefully place the chocolate-coated cookie balls back onto the parchment-lined baking sheet. If desired, you can sprinkle them with a pinch of sea salt, additional Oreo crumbs, or festive sprinkles immediately after dipping, before the chocolate sets.
- Chill to Set: Once all the cookie balls are dipped, return the baking sheet to the refrigerator for another 15-20 minutes, or until the chocolate coating is completely set and firm.
- Serve and Enjoy: Once the chocolate is set, your 3 Ingredient Peanut Butter Oreo Cookie Balls are ready to be enjoyed! Serve them chilled or at room temperature.
Cooking Tips and Variations
Achieving perfection with these simple cookie balls is easy with a few insider tips. First and foremost, the consistency of your Oreo crumbs is paramount. Using a food processor ensures a very fine, uniform crumb, which is essential for a smooth, well-bound mixture. If your crumbs are too chunky, the balls might be difficult to roll and could crumble. When mixing the peanut butter and Oreo crumbs, don’t be afraid to get your hands in there! Your hands are often the best tool for thoroughly combining the ingredients and ensuring an even mixture. The warmth of your hands can also slightly soften the peanut butter, aiding in the binding process. Make sure the mixture is firm enough to hold its shape but still pliable. If it feels too dry, you might add another half tablespoon of peanut butter; if too wet, a tablespoon of extra crushed Oreos can help.
Chilling the cookie balls before dipping is a non-negotiable step. This firming-up period prevents the balls from disintegrating in the warm chocolate and makes the dipping process much cleaner and easier. When melting your chocolate, low and slow is the way to go. Overheating chocolate can cause it to seize, becoming thick and grainy. If using a microwave, stir frequently between short bursts. Adding a teaspoon of coconut oil or shortening to your melting chocolate is a fantastic trick for creating a smoother, more fluid coating that’s easier to work with and results in a glossy finish. For dipping, a regular fork works wonderfully, allowing excess chocolate to drip off, or you can invest in specific candy dipping tools for an even more professional look. Place the dipped balls back on parchment paper promptly to prevent sticking.
The beauty of this recipe lies in its adaptability. While original Oreos provide that classic flavor, feel free to experiment with different Oreo varieties! Golden Oreos, Mint Oreos, or even Peanut Butter Oreos can create exciting new flavor profiles. For an added layer of texture and visual appeal, consider rolling the finished chocolate-coated balls in chopped nuts, shredded coconut, mini chocolate chips, or even more crushed Oreos before the chocolate sets. You can also drizzle them with contrasting white chocolate for an elegant touch. For a festive twist, add a few drops of peppermint extract to your melted chocolate for a holiday-ready treat, or a dash of vanilla extract to the peanut butter mixture for enhanced depth of flavor. A sprinkle of flaky sea salt on top of the still-wet chocolate coating is highly recommended, as it beautifully balances the sweetness and elevates the overall taste experience.
Storage and Reheating
These 3 Ingredient Peanut Butter Oreo Cookie Balls are a fantastic make-ahead dessert, perfect for parties or simply having a sweet treat on hand. Proper storage is key to maintaining their delicious taste and texture. Once the chocolate coating has fully set, transfer the cookie balls to an airtight container. It’s best to layer them with parchment paper or wax paper between layers to prevent them from sticking together, especially if your kitchen is warm. Store the container in the refrigerator. When stored correctly, these cookie balls will stay fresh and delicious for up to 1-2 weeks. The cool temperature of the refrigerator helps keep the chocolate firm and prevents the peanut butter and Oreo mixture from becoming too soft.
As these are a no-bake treat, reheating is not applicable or recommended. These cookie balls are best enjoyed chilled, straight from the refrigerator, or at cool room temperature. Serving them chilled provides a firmer, more satisfying bite, while allowing them to sit out for about 10-15 minutes before serving can slightly soften the center, enhancing the creamy peanut butter texture. Avoid leaving them out at warm room temperature for extended periods, as the chocolate coating can soften and become sticky, and the interior may lose its desirable firm texture. If you’ve prepared a large batch for an event, simply take out the desired number of cookie balls from the refrigerator about 15 minutes before serving to allow them to come to a perfect temperature for optimal enjoyment.
Frequently Asked Questions
Can I use crunchy peanut butter instead of creamy?
While creamy peanut butter is recommended for its smooth binding properties and consistent texture, you can absolutely use crunchy peanut butter for these cookie balls. Be aware that the texture of the finished product will be different, with noticeable peanut chunks throughout. If you do use crunchy peanut butter, ensure it’s well-stirred, and you might need to use slightly more than the recipe calls for, as the chunky bits can sometimes make the mixture a bit drier. Adjust the quantity incrementally until the mixture holds together well when rolled.
Can I use natural peanut butter for this recipe?
Yes, you can use natural peanut butter, but there’s an important consideration. Natural peanut butter, especially the “stir” varieties, often separates with a layer of oil on top. For this recipe, it’s crucial that your natural peanut butter is very well-stirred to achieve a consistent, thick paste. If it’s too oily, the cookie ball mixture might be too wet and won’t hold its shape properly. You might even consider slightly draining off some of the excess oil if it’s particularly runny, or compensate by adding a bit more crushed Oreo crumbs to absorb the extra moisture.
How long do these 3 Ingredient Peanut Butter Oreo Cookie Balls last?
When stored properly in an airtight container in the refrigerator, these cookie balls will remain fresh and delicious for up to 1 to 2 weeks. The cool environment helps to keep the chocolate firm and prevents the interior from spoiling. They are a fantastic make-ahead treat, allowing you to prepare them well in advance for parties or holiday gatherings without worrying about them losing quality.
Can I freeze these cookie balls?
Absolutely! These cookie balls freeze exceptionally well. To freeze them, place the fully set, chocolate-coated balls in a single layer on a parchment-lined baking sheet and freeze for about an hour, or until solid. Once frozen, transfer them to a freezer-safe airtight container or a heavy-duty freezer bag, separating layers with parchment paper to prevent sticking. They can be stored in the freezer for up to 2-3 months. When you’re ready to enjoy them, simply take them out of the freezer and let them thaw in the refrigerator for a few hours or at room temperature for about 30 minutes before serving. They taste great straight from the freezer too!
